
1. Registering your group
Step 1. Go to https://stridesvolunteers.org and click Group Sign Up.
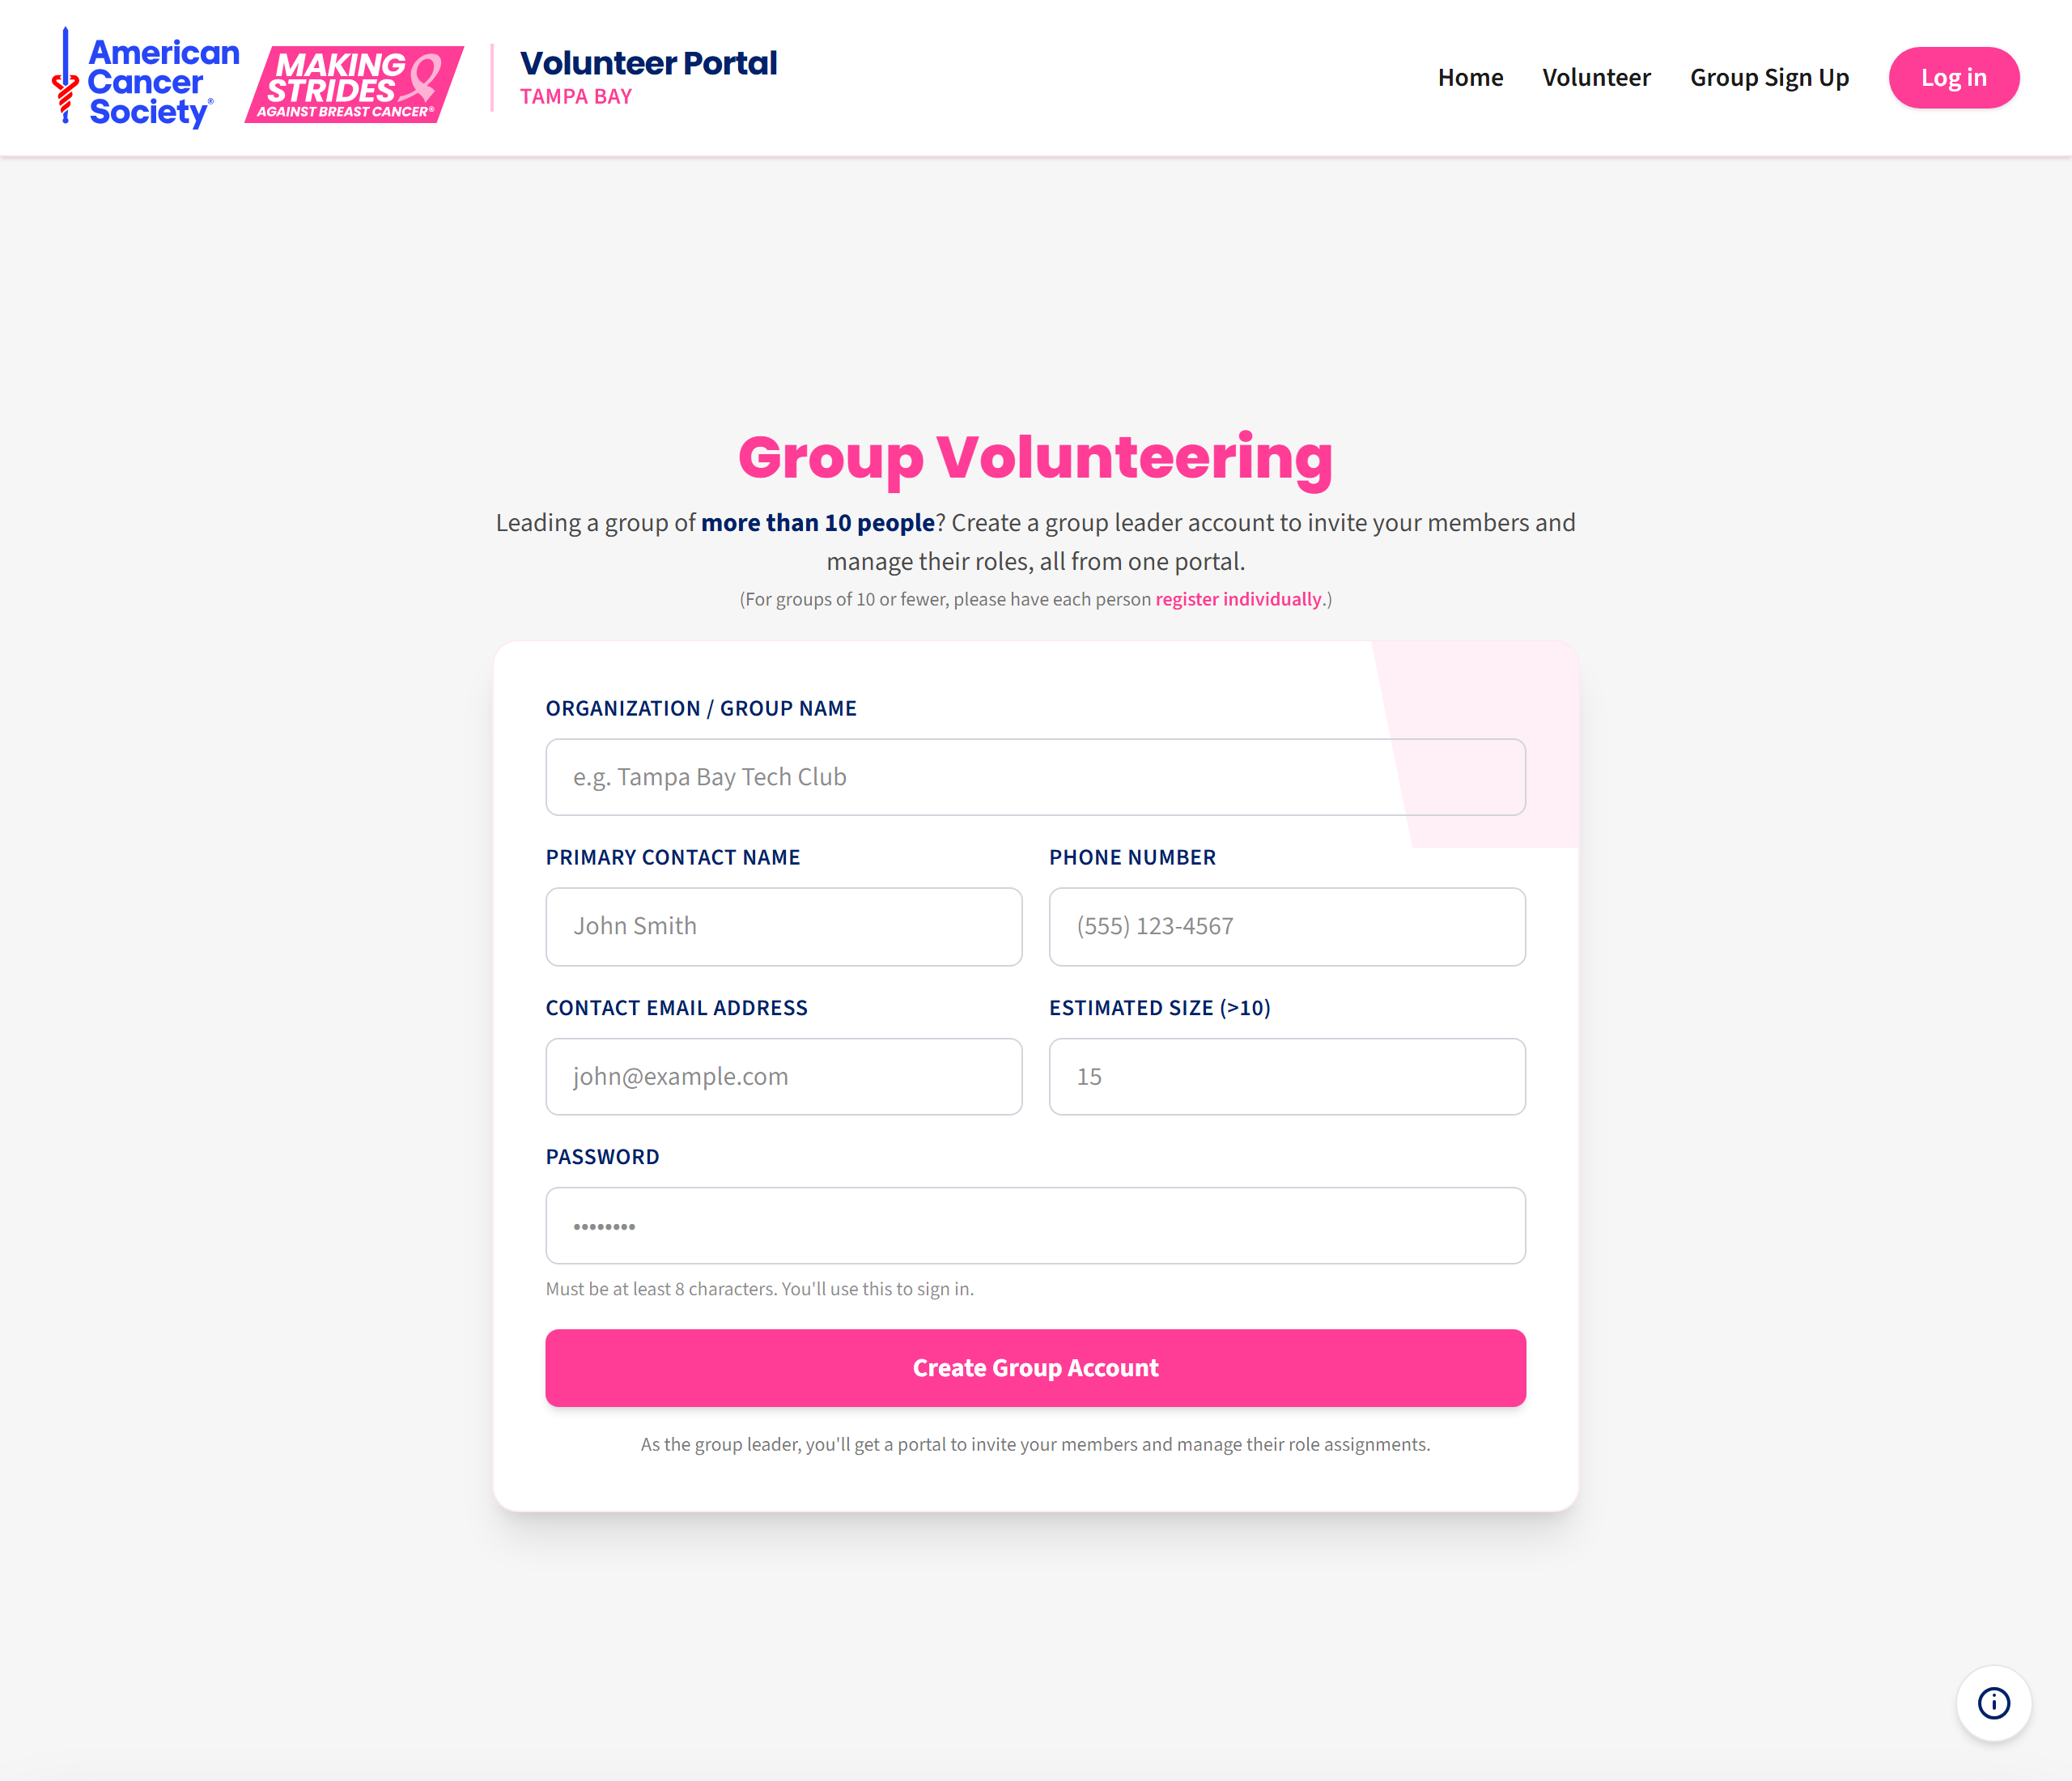
Step 2. Fill in the boxes:
| Box | What to type |
|---|---|
| Organization / group name | What your group is called. Members see this name when they join, so make it recognisable. |
| Primary contact name | Your name. You become the group leader. |
| Phone number | A number we can reach you on. |
| Contact email address | Your email. This is also your sign-in name. |
| Estimated size | Roughly how many people you are bringing. Must be 11 or more. A guess is fine. |
| Password | At least 8 characters. You will use this to sign in. |
Step 3. Tick the security box and click Create Group Account.
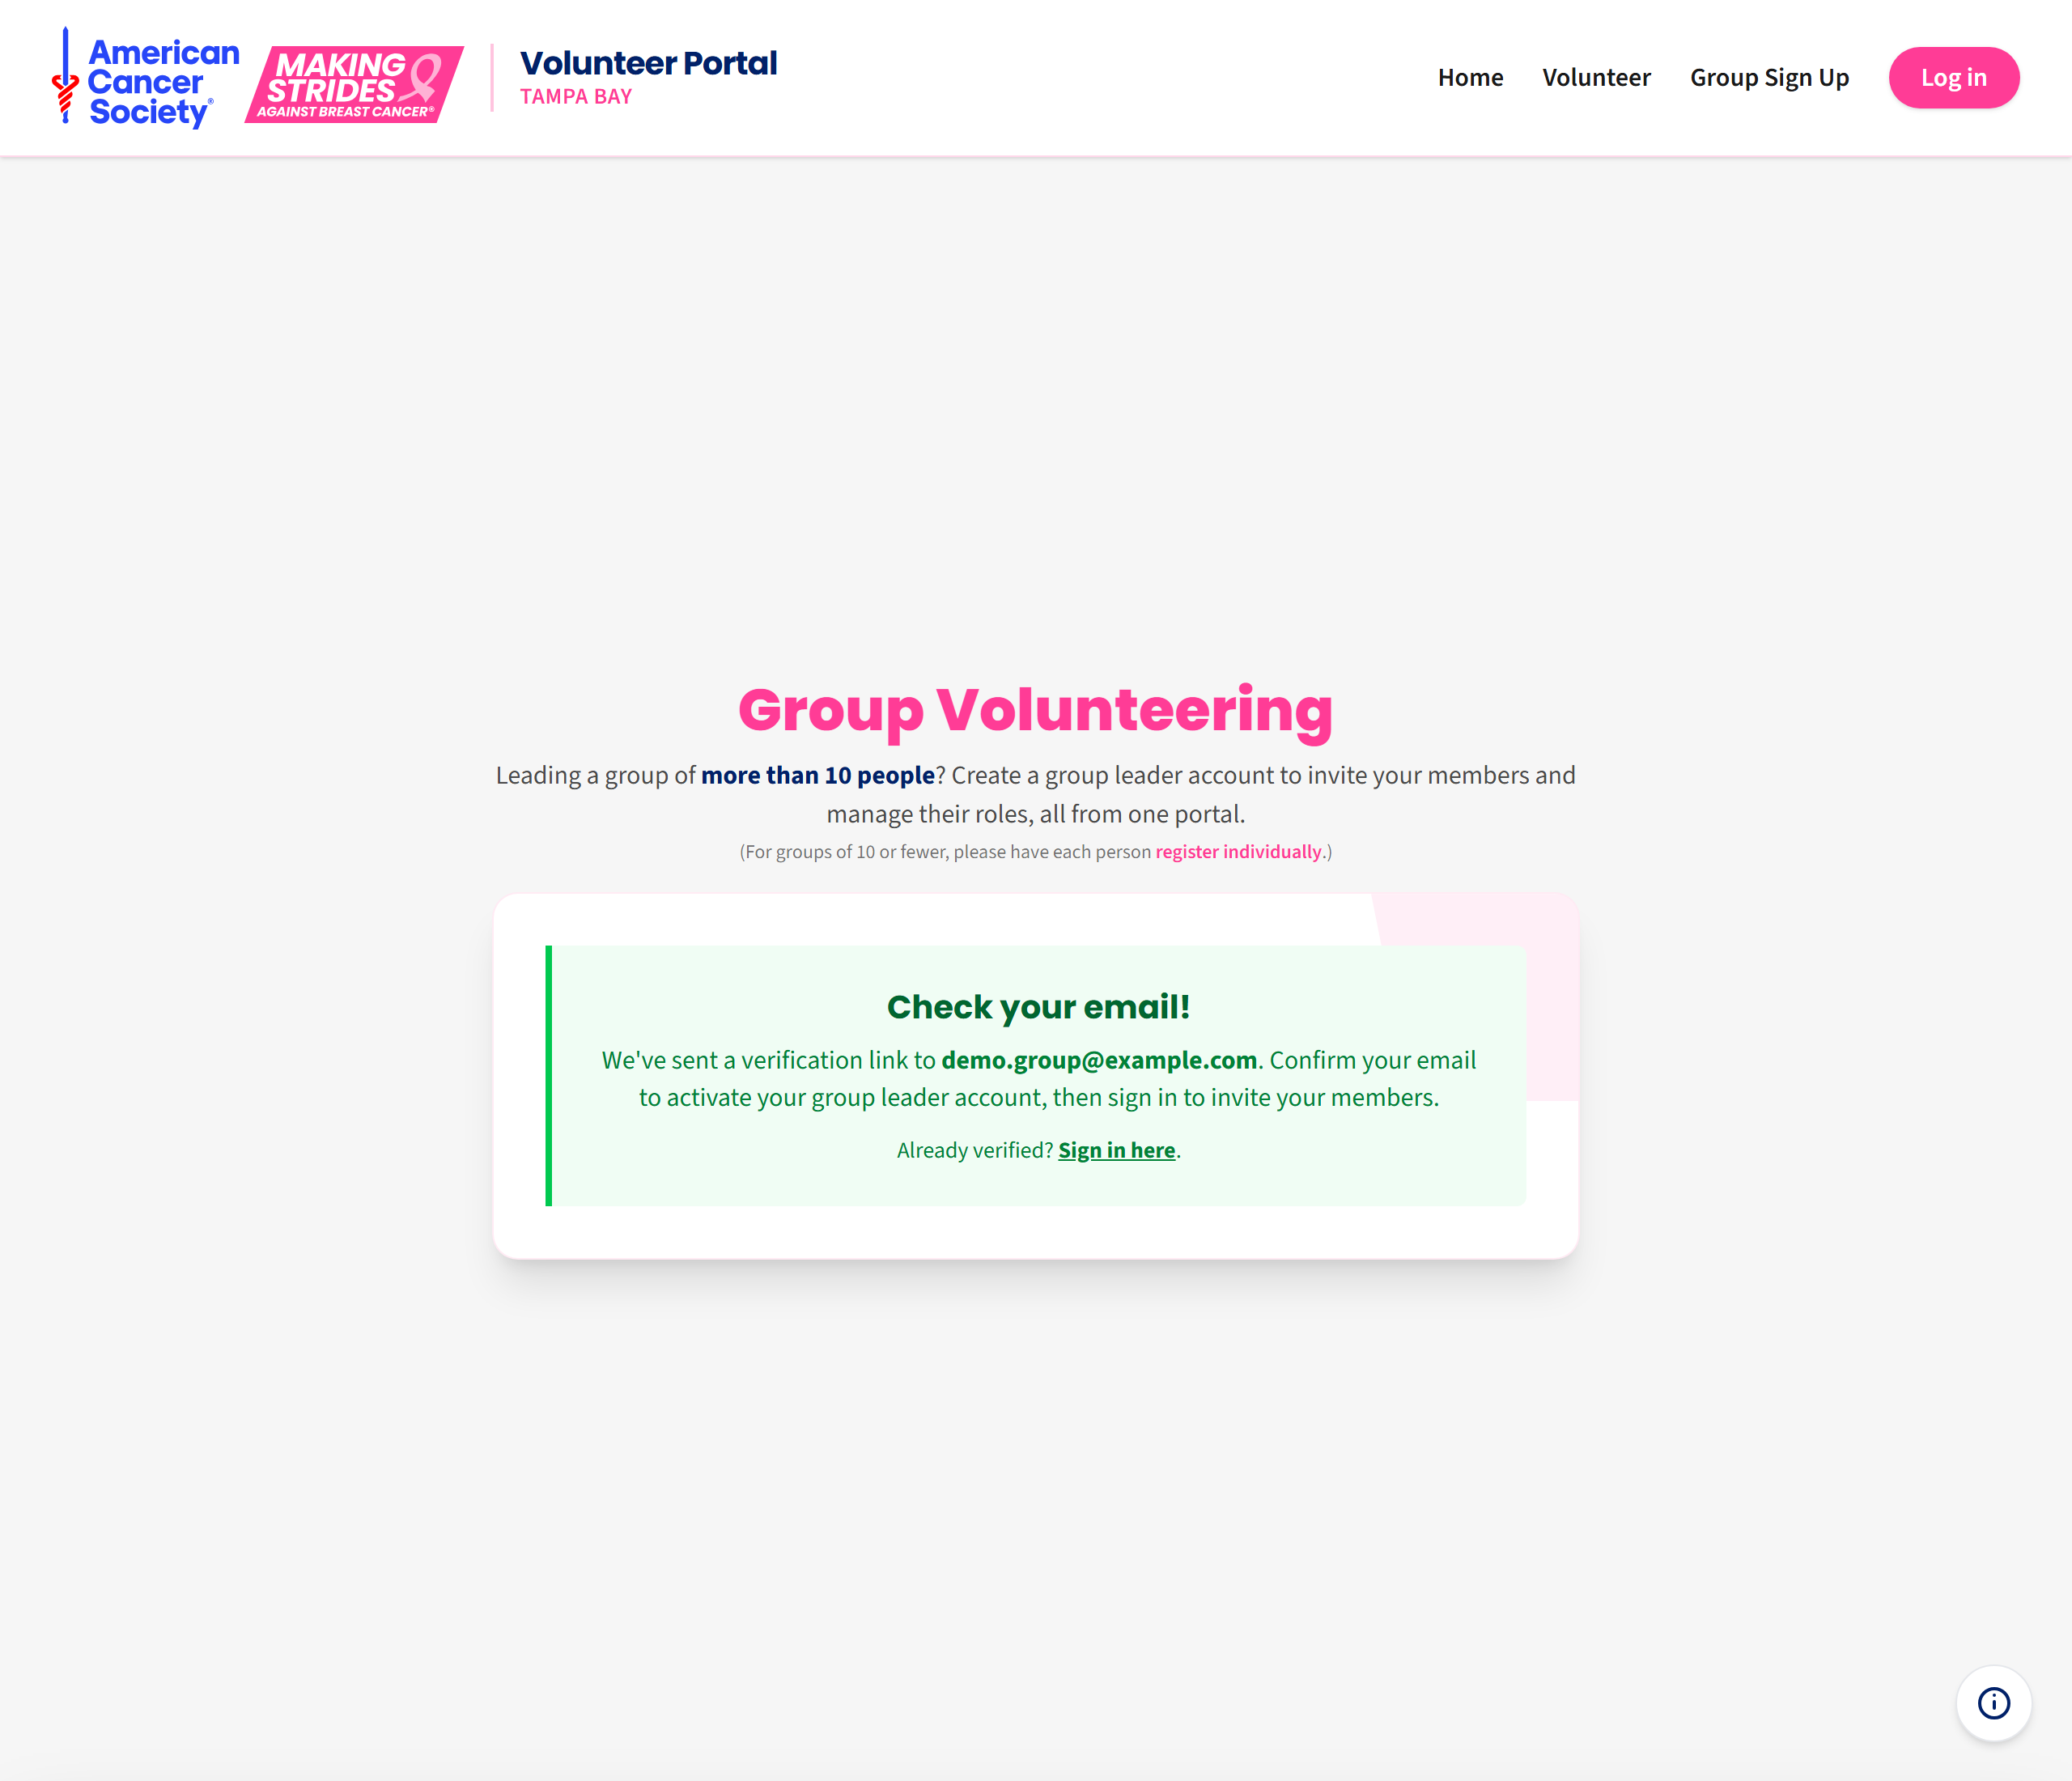
Step 4. Open your email and click Verify my email. Your account is not active until you do.
If it says an account already exists with this email, you have signed up before with that address. Use a different email, or sign in with the original account.
2. Finding your Group Portal
Sign in at https://stridesvolunteers.org with the email and password you just chose. Because you lead a group, you get the Group Portal rather than the ordinary volunteer page.
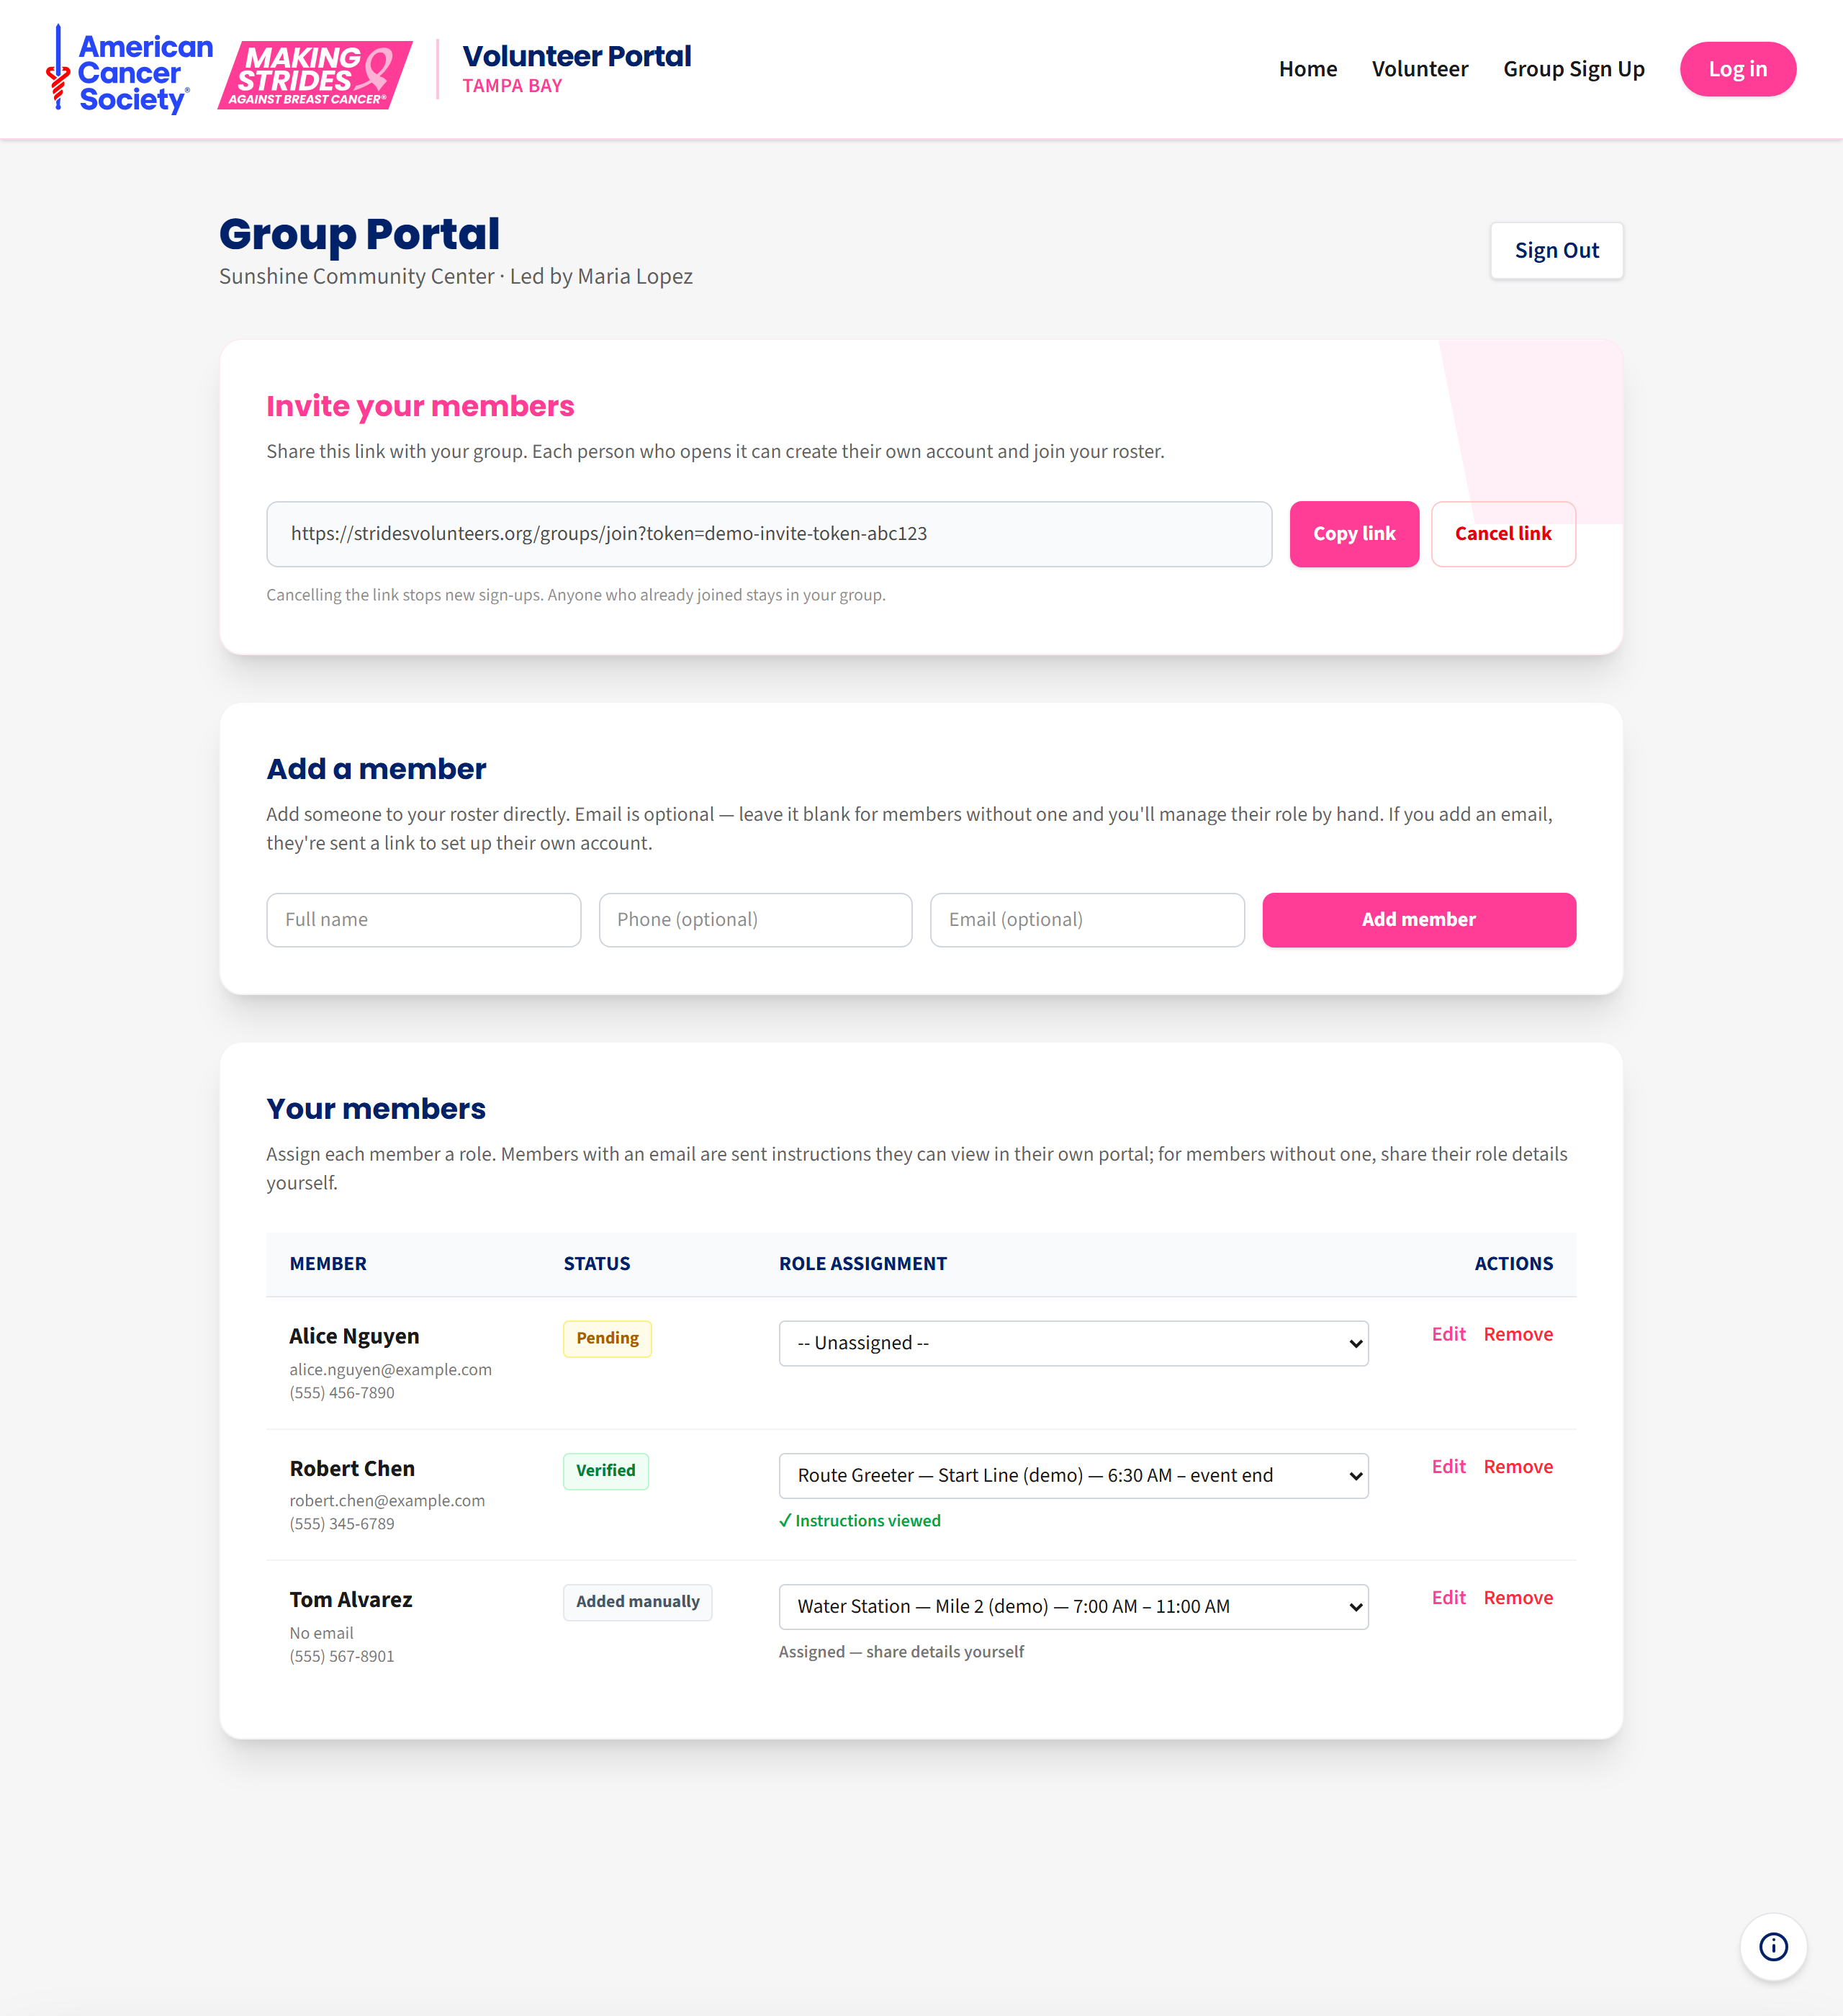
It has three sections, top to bottom:
- Invite your members — the link you share.
- Add a member — for adding people yourself.
- Your members — your roster, and where you assign jobs.
3. Inviting members with a link
This is the easiest way to build your roster: each person fills in their own details and chooses their own password, so you do not have to collect anything.
Step 1. In the Invite your members box, click Generate invite link.

Step 2. Your link appears. Click Copy link.
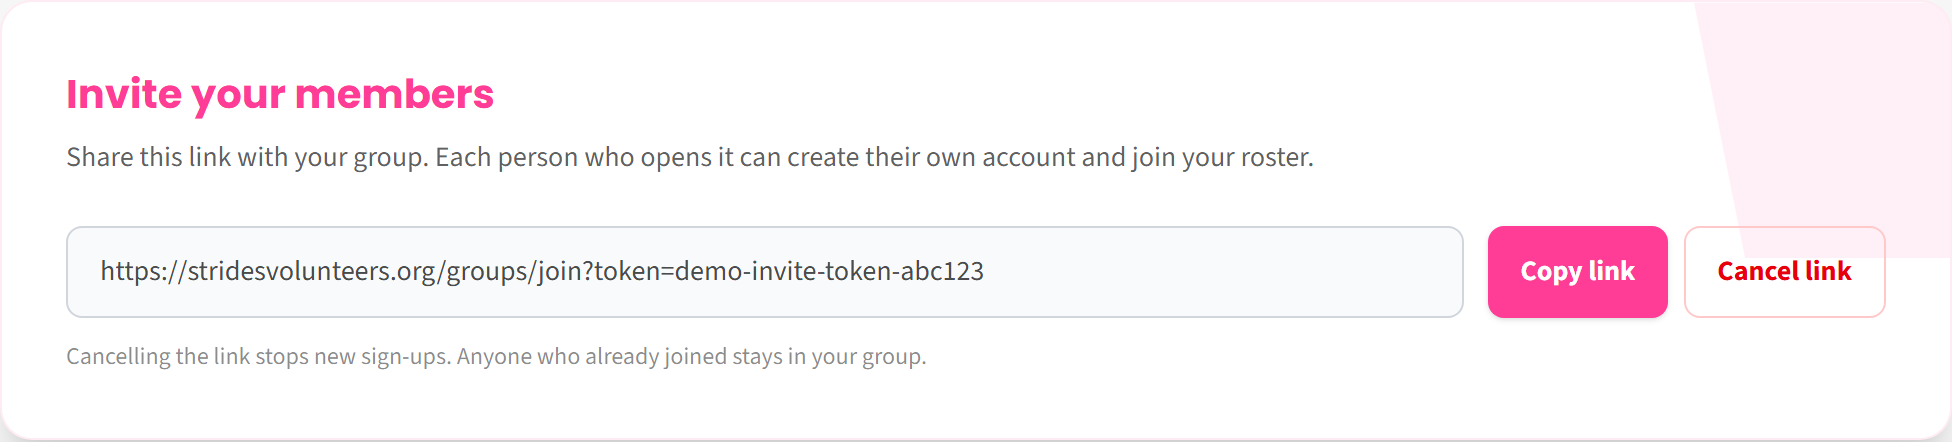
Step 3. Paste the link into an email, group chat or newsletter and send it to your members. Anyone who opens it can create their own account and is added straight to your roster.
Step 4. As people join, they appear in Your members below. Refresh the page to see new arrivals.
Cancelling the link
Click Cancel link to switch it off — useful once everyone has joined, or if the link was shared more widely than you intended.
- Nobody new can use that link afterwards.
- Everyone who already joined stays in your group. Nothing is lost.
- Clicking Generate invite link again creates a different link. The old one stays dead, so re-send the new one to anyone who still needs it.
4. Adding a member yourself
Use this for people who do not use email, or when you already have everyone’s details on a sheet.
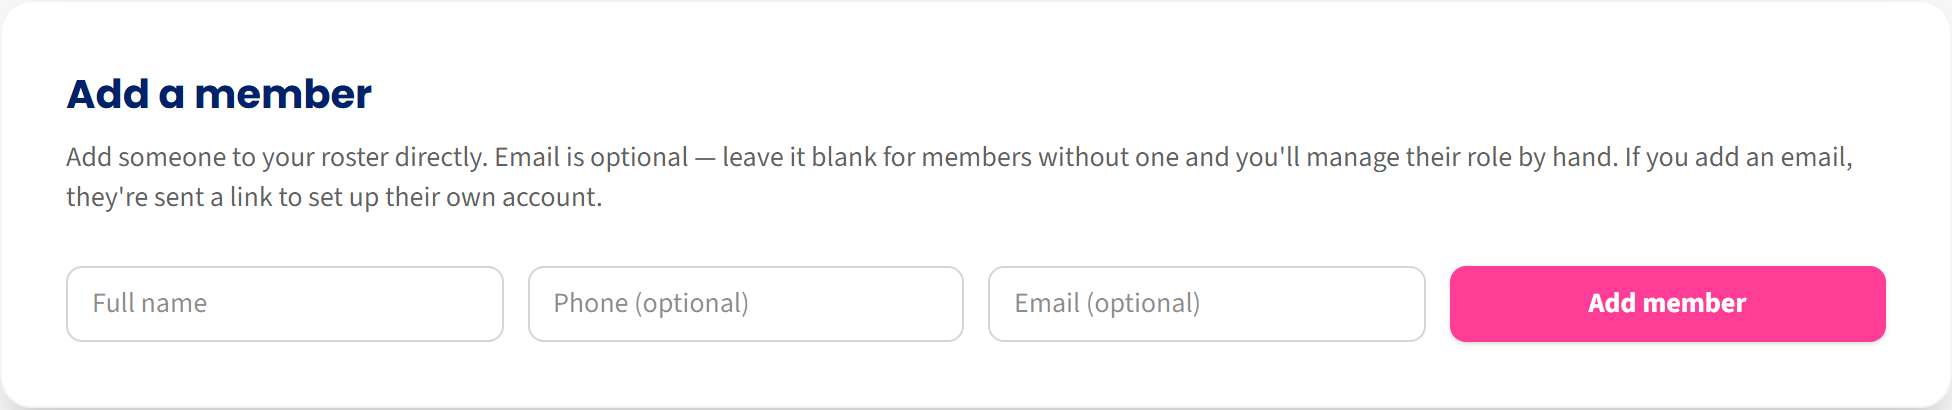
Type their full name, and optionally a phone number and email address, then click Add member.
The email box is the important choice:
| If you… | What happens |
|---|---|
| Enter an email address | They are emailed a link to set their own password. They can then sign in, see their job and read their instructions themselves. |
| Leave the email blank | They are added to your roster with no account and are never emailed. You manage them by hand and pass on their job details yourself. |
You can add an email address later — see Editing a member. Adding one sends them the set-up invitation at that point.
5. Understanding the member list
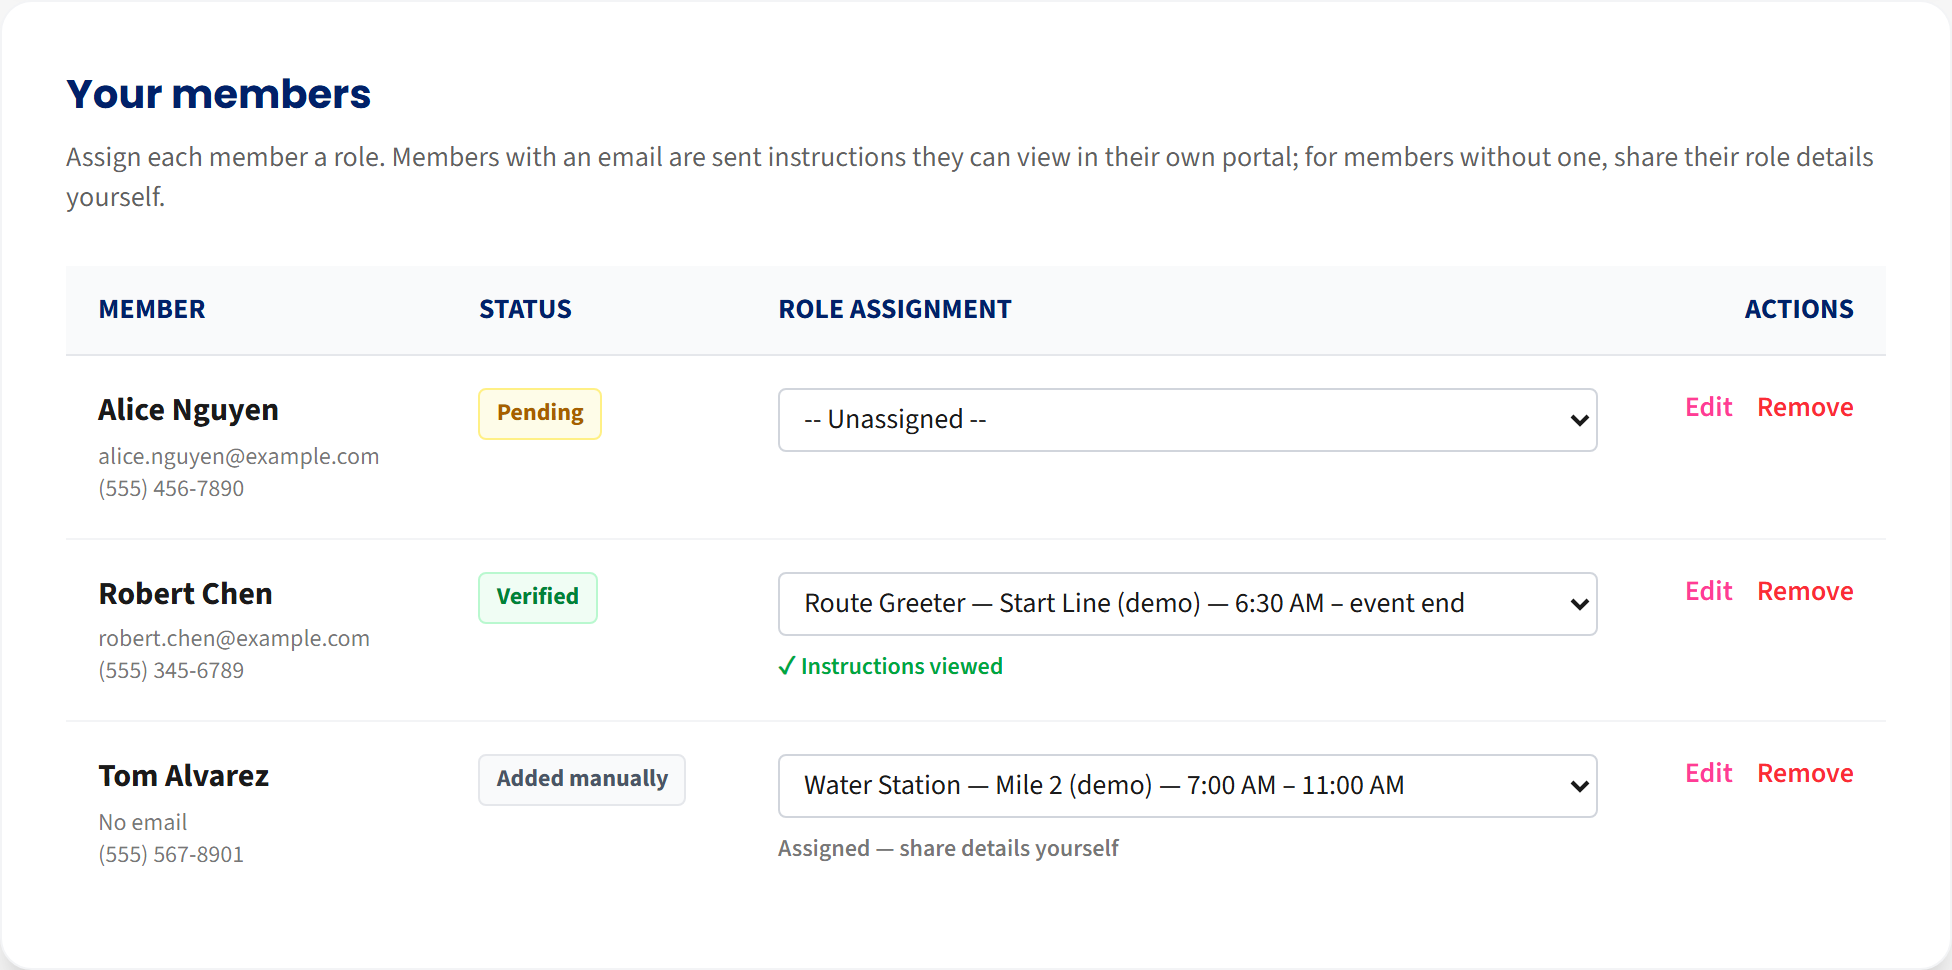
The Status column tells you where each person is:
| Status | Meaning | What to do |
|---|---|---|
| Verified (green) | They have set up their account and clicked their email link. Nothing more needed. | Nothing. |
| Pending (yellow) | They have an email address but have not finished setting up their account. | Remind them to check their inbox. |
| Added manually (grey) | No email address, so no account. | Pass on their job details yourself. |
6. Giving members a job
In the Role assignment column, click the drop-down next to a person’s name and pick a job. It saves immediately — there is no separate save button.
Underneath, a short note tells you what happened:
| Note | Meaning |
|---|---|
| Emailed — not viewed yet (yellow) | They have been emailed their job but have not opened the details. |
| ✓ Instructions viewed (green) | They have opened their instructions. |
| Assigned — share details yourself | This person has no email address, so nobody was emailed. Tell them in person. |
Jobs that are full
Every job can have a limit. A job that has reached its limit shows (full) and cannot be picked. If someone in your group already holds that job, it stays selected for them — only new assignments are blocked.
If you need a full job for someone, email volunteers@stridesvolunteers.org — coordinators can go over the limit when there is a good reason.
7. Editing or removing a member
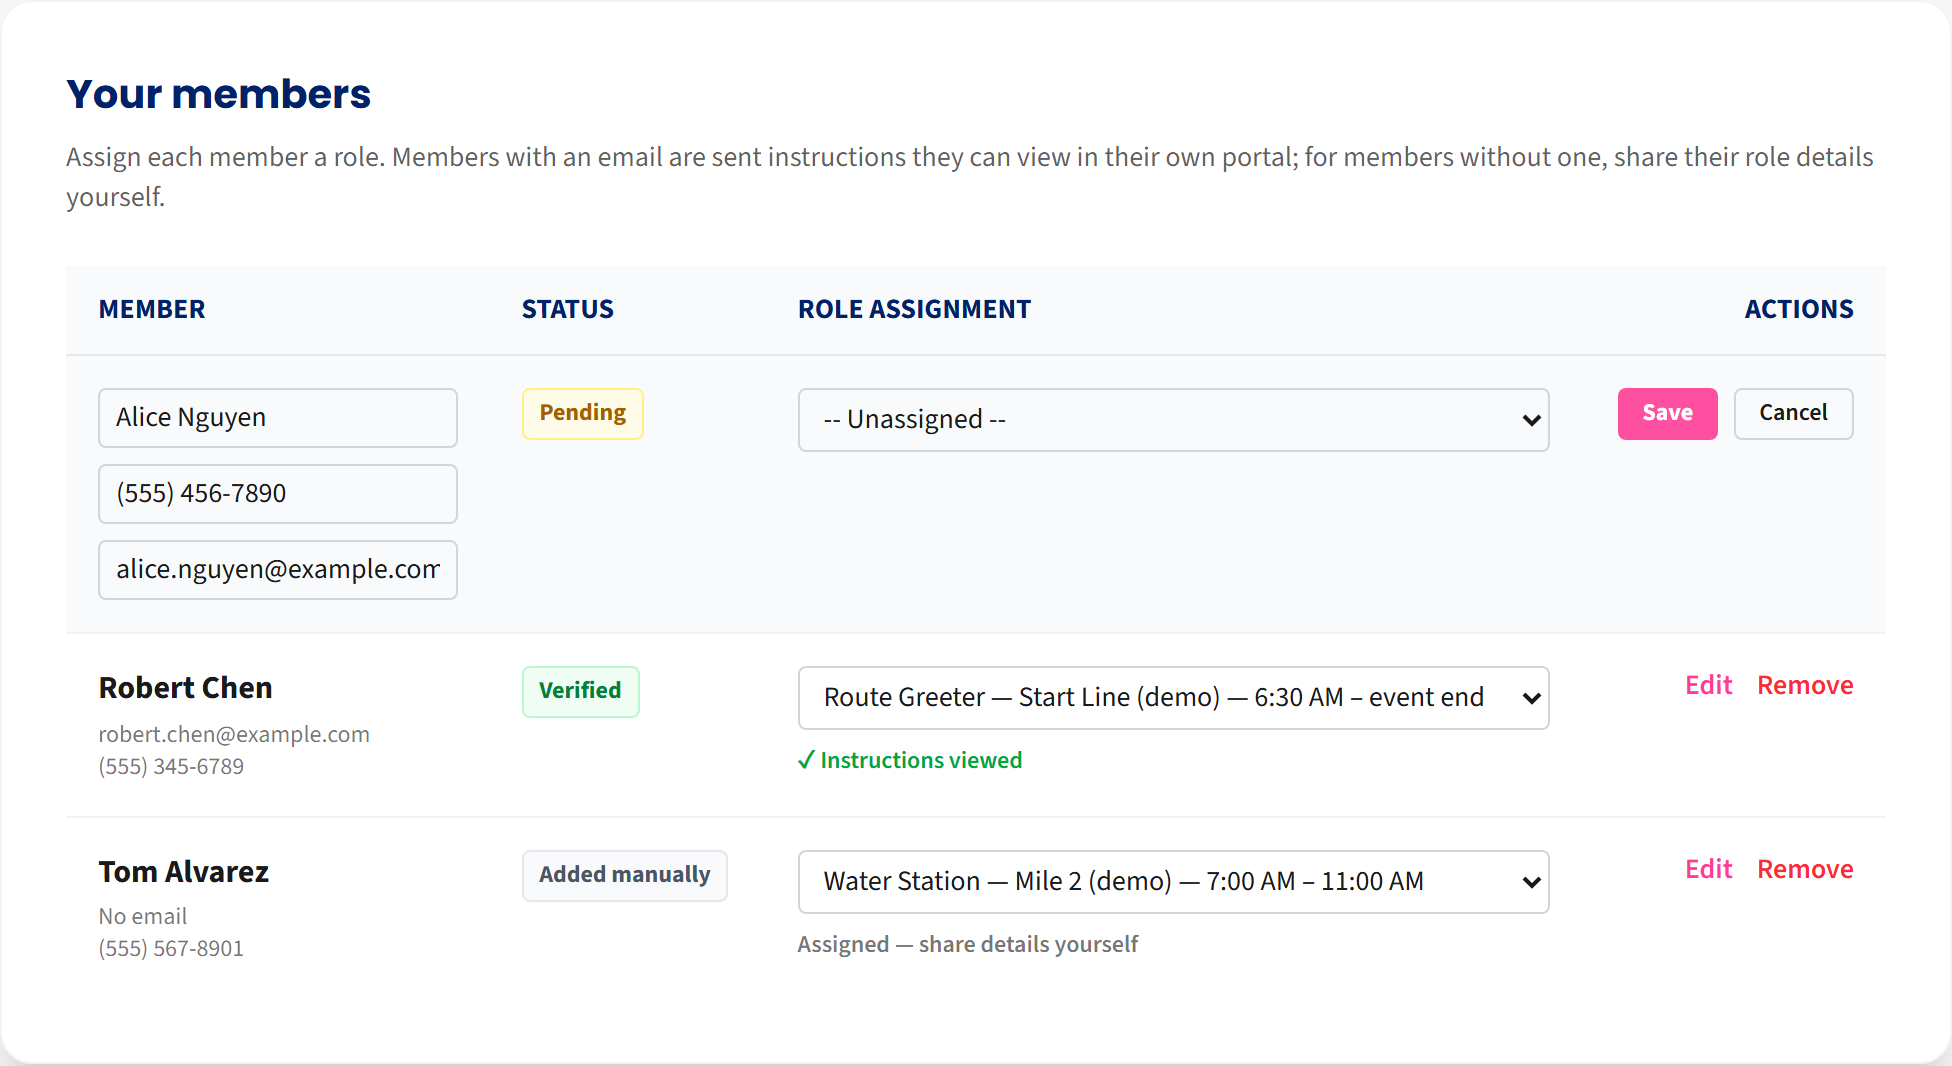
To edit: click Edit on their row. You can change their name, phone number and email address. Click Save, or Cancel to discard.
Two things to know about the email box when editing:
- Adding an email to someone who has not set up an account sends them the set-up invitation, exactly as if you had just added them.
- You cannot remove an email address once that person has created a password — they need it to sign in. The site will tell you so if you try.
- If the address already belongs to another account, you will be told it is in use. Every account needs its own address.
To remove: click Remove and confirm. This deletes their volunteer record. It cannot be undone, so use it for genuine withdrawals or duplicates.
8. Common questions
Do my members need to sign up separately as well? No. Joining through your invite link is their whole sign-up. They should not also fill in the individual volunteer form, or they will end up with two records.
Someone signed up on their own before I sent the link. Can they be moved into my group? Yes, but only a coordinator can do it. Email volunteers@stridesvolunteers.org with your group name and their name.
Can I be a volunteer as well as the leader? Yes. A coordinator assigns your job — you cannot assign one to yourself from the Group Portal, which only lists your members. Ask a coordinator for your own role.
Can somebody else lead the group instead of me? The group belongs to the account that created it, and leaders cannot be swapped from within the portal. Ask a coordinator to make the change.
My group is smaller than I estimated. Does that matter? No. The estimated size is only a planning guide — nothing depends on it.
Do I have to give everyone a job? No. Leave people Unassigned and a coordinator can place them. Assigning jobs yourself simply gives you more control over who does what.